
Email support
Email tutorials
Getting started
Windows Live Mail
1. Open Windows Live Mail.
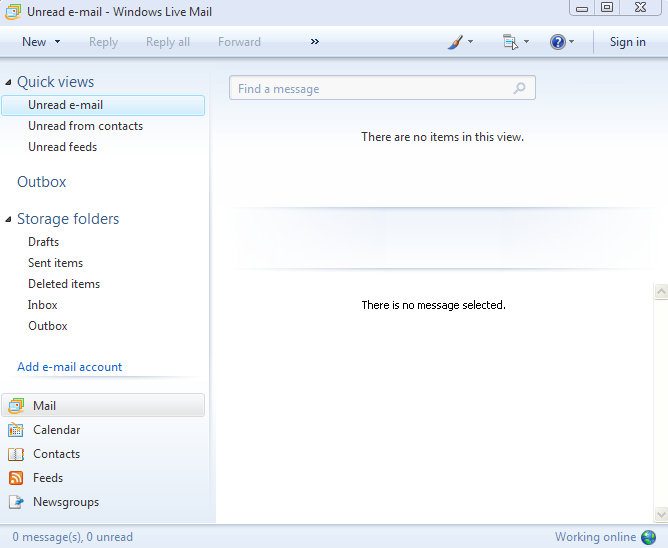
2. Click on Add e-mail account.
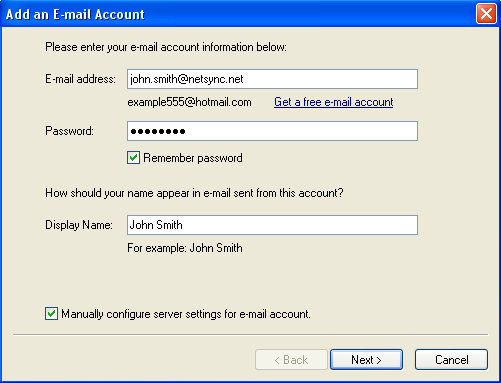
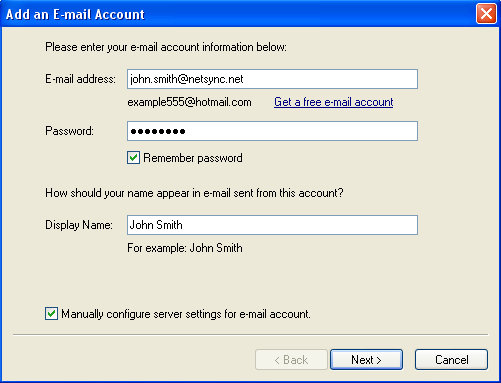
3. Enter your e-mail address into the E-mail address field, then enter your password into the Password field. Next, enter your name into the Display Name field. Place a check mark inside the check box labeled Manually configure server settings for e-mail account. Then click Next.
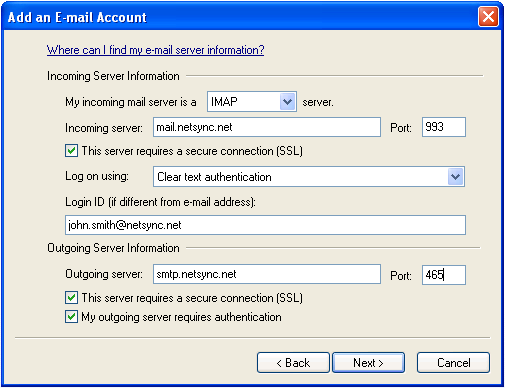
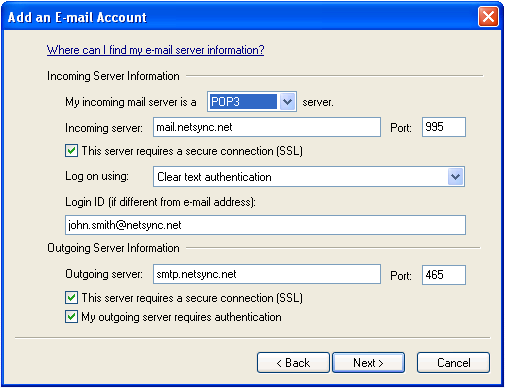
4. Please enter all information exactly as you see it in the image below with the exception of the Login ID field. Please enter your e-mail address into the Login ID field. Then click Next.
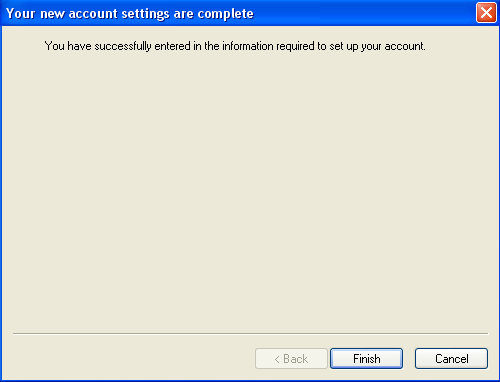
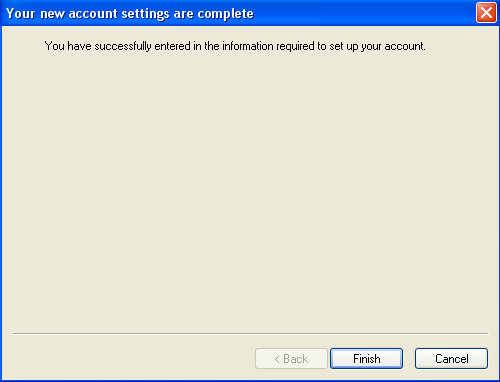
5. You will be greeted with a summary page that tells you you’ve entered everything you need to setup the account. Click on the Finish button.
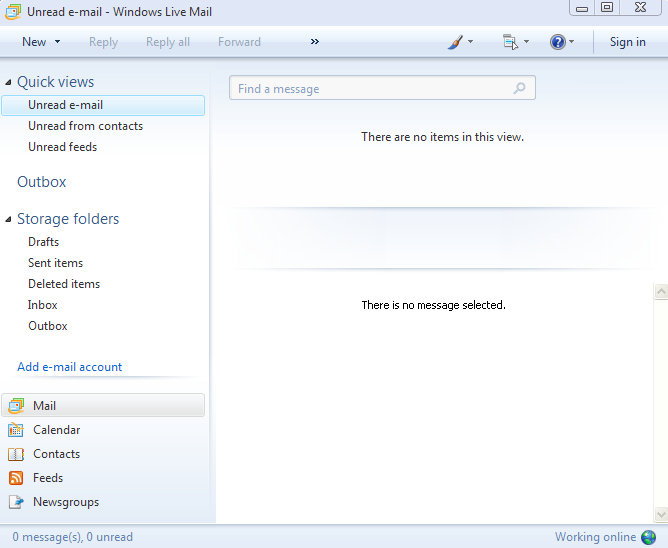
1. Open Windows Live Mail.
2. Click on Add e-mail account.
3. Enter your e-mail address into the E-mail address field, then enter your password into the Password field. Next, enter your name into the Display Name field. Place a check mark inside the check box labeled Manually configure server settings for e-mail account. Then click Next.
4. Please enter all information exactly as you see it in the image below with the exception of the Login ID field. Please enter your e-mail address into the Login ID field. Then click Next.
5. You will be greeted with a summary page that tells you you’ve entered everything you need to setup the account. Click on the Finish button.
Outlook
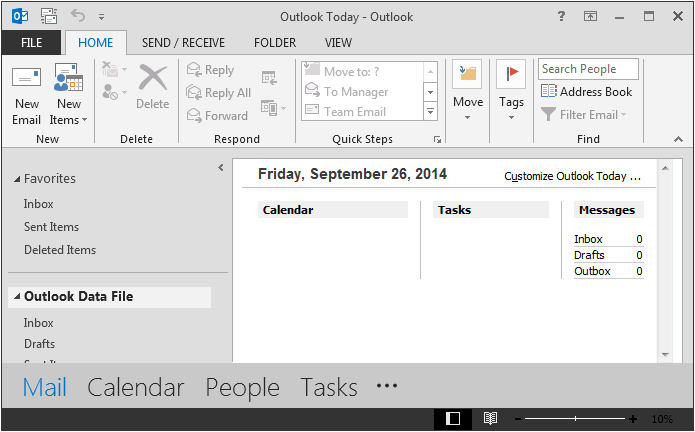
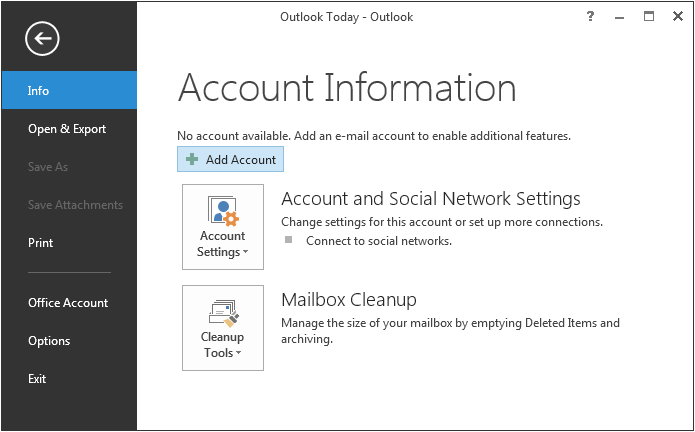
1. Open Outlook 2013. Then click on the File tab.
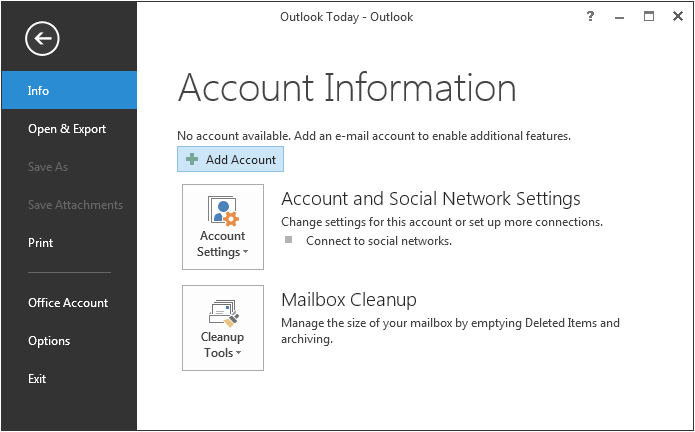
2. Click on the Add Account button.
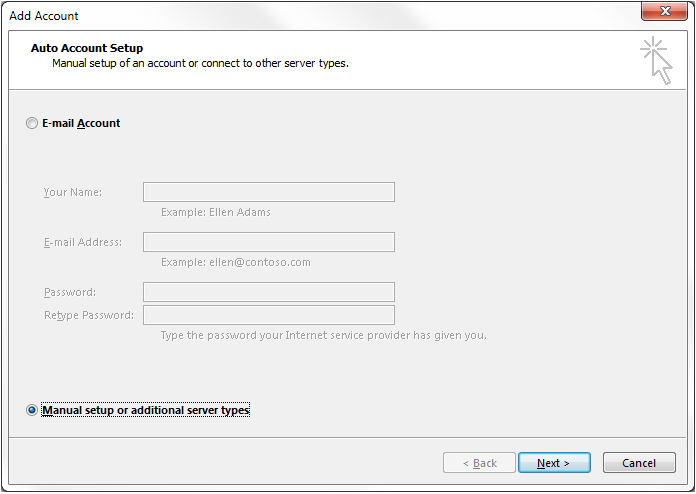
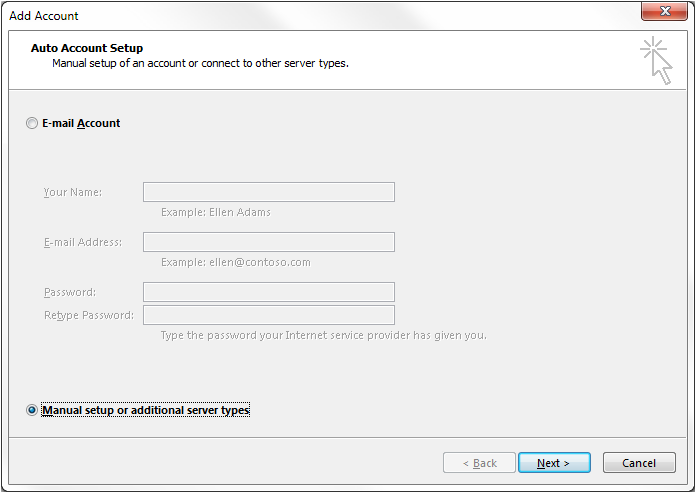
3. Click on Manual setup or additional server types. Then click Next.
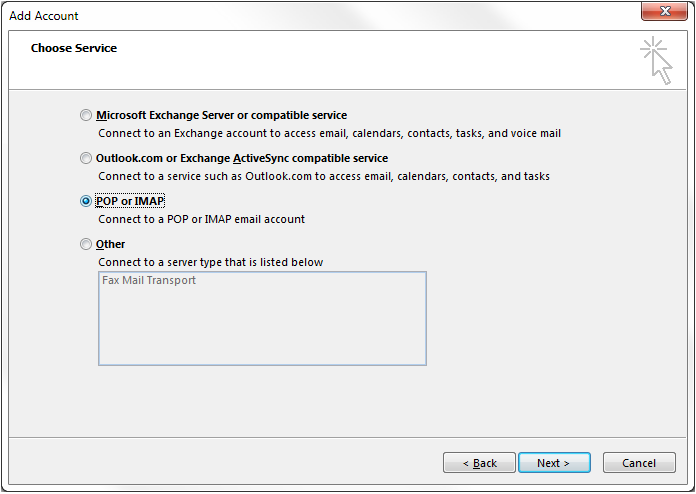
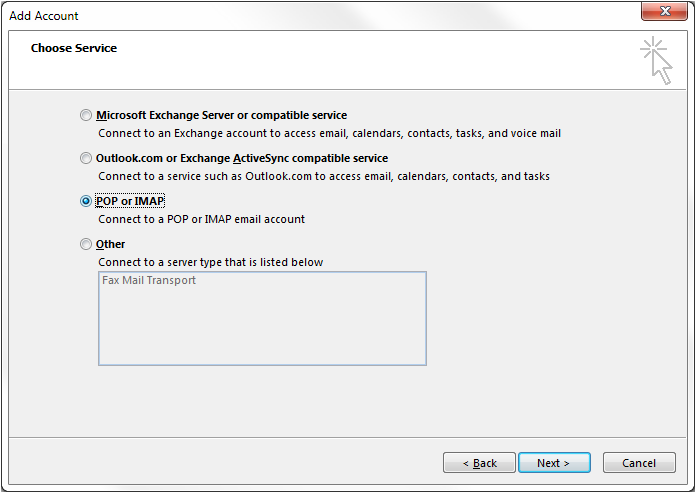
4. Click on POP or IMAP. Then click Next.
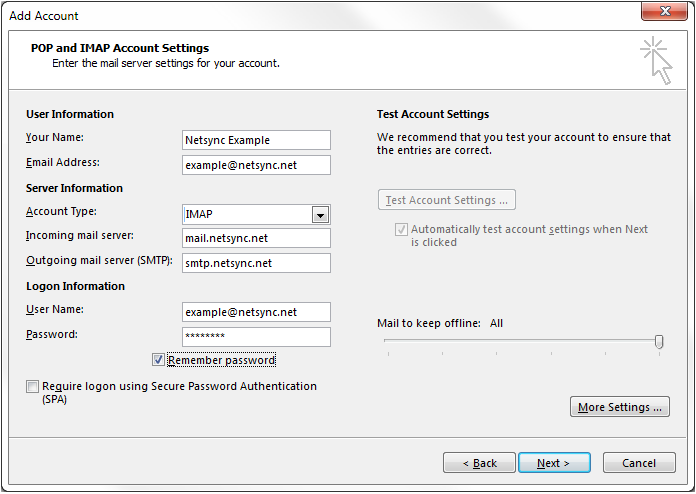
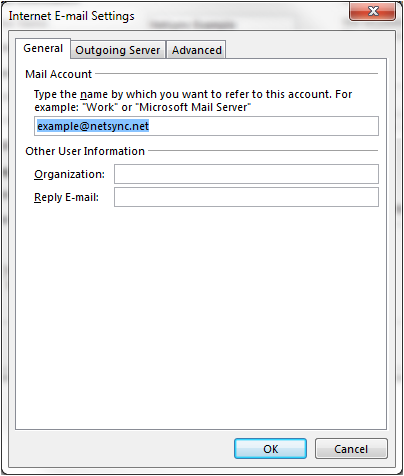
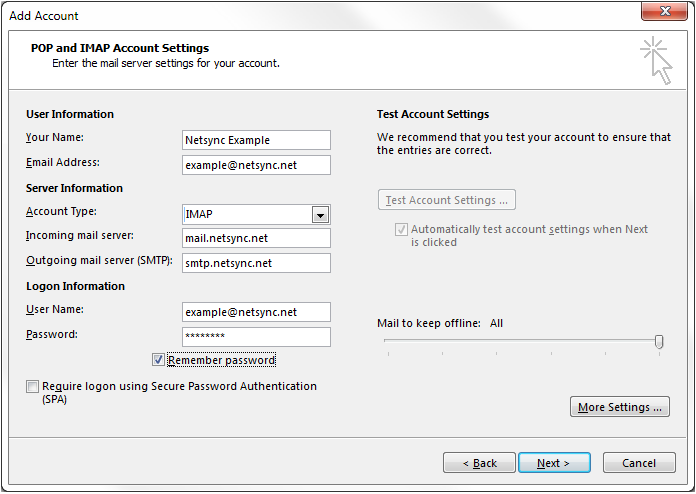
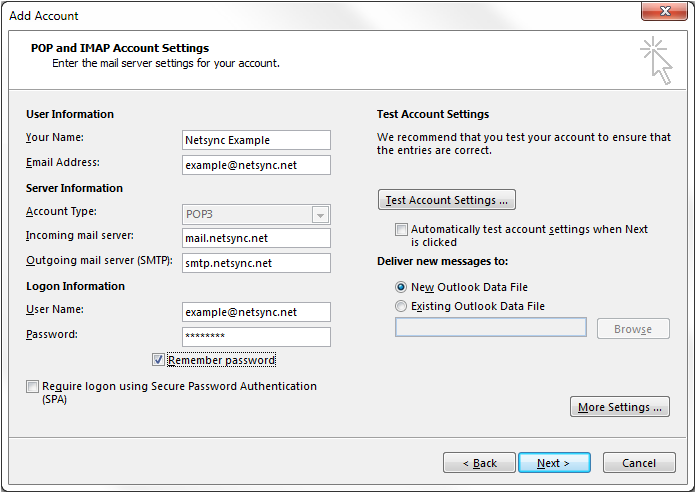
5. Please enter the information exactly as how it appears in the image below with the exceptions of your name and e-mail address in which you’ll want to use your own name and e-mail address. Then click on the More Settings button.
6. Click on the Outgoing Server tab.
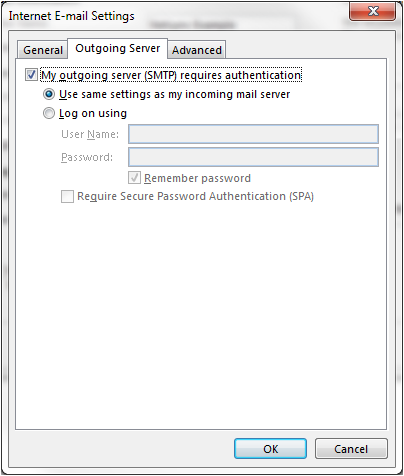
7. Place a check mark in the box for My outgoing server (SMTP) requires authentication. Then click the Advanced tab.
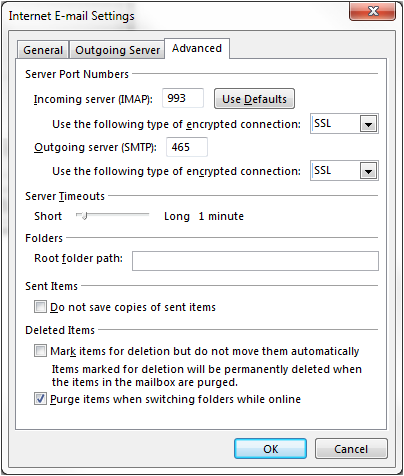
8. Please enter the information exactly as it appears in the image below. Then click OK.
9. Click Next.
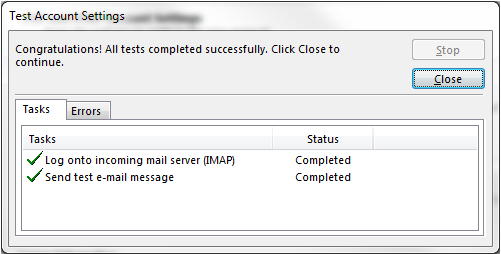
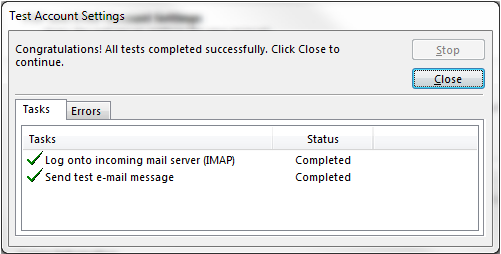
10. Wait for Outlook to test the mail settings, and you should see a window that matches the image below. Then click Close.
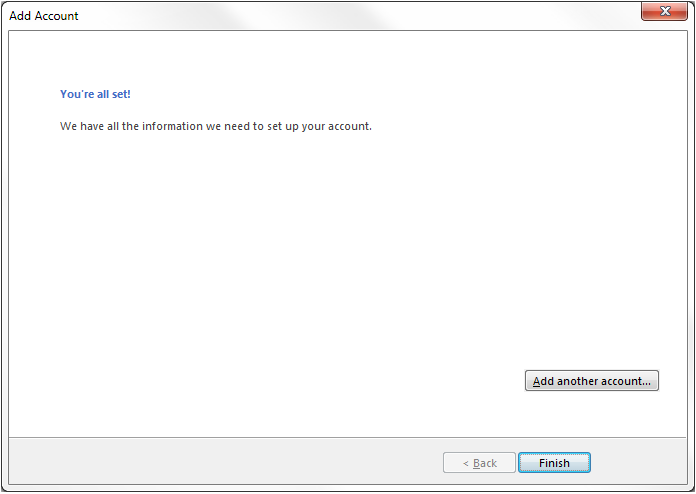
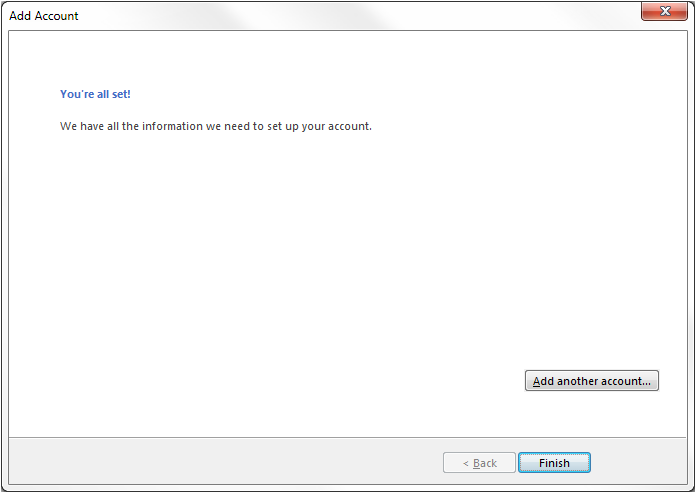
11. Click Finish.
1. Open Outlook 2013. Then click on the File tab.
2. Click on the Add Account button.
3. Click on Manual setup or additional server types. Then click Next.
4. Click on POP or IMAP. Then click Next.
5. Please enter the information exactly as how it appears in the image below with the exceptions of your name and e-mail address in which you’ll want to use your own name and e-mail address. Then click on the More Settings button.
6. Click on the Outgoing Server tab.
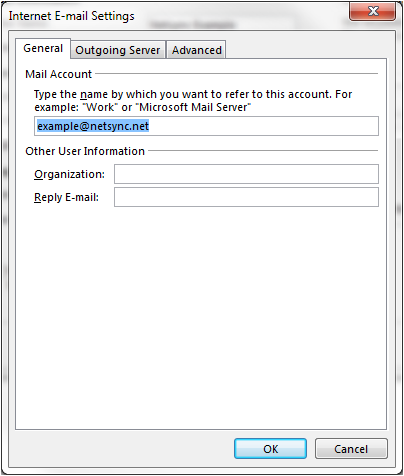
7. Place a check mark in the box for My outgoing server (SMTP) requires authentication. Then click the Advanced tab.
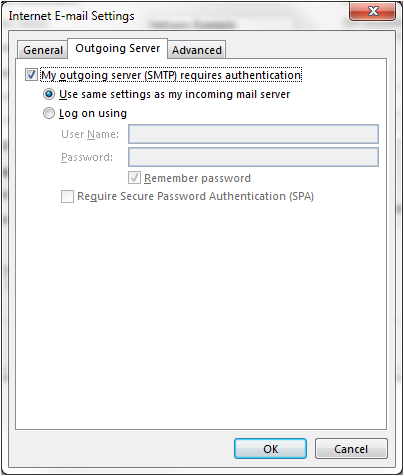
8. Please enter the information exactly as it appears in the image below. Then click OK.
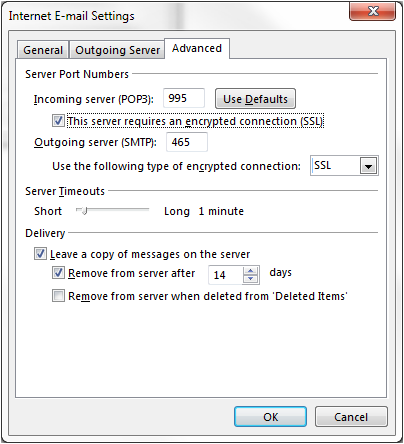
9. Click Next.
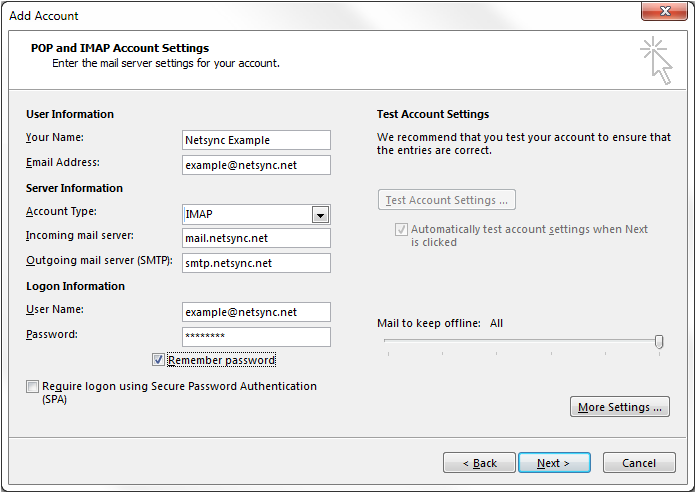
10. Wait for Outlook to test the mail settings, and you should see a window that matches the image below. Then click Close.
11. Click Finish.
Mozilla Thunderbird
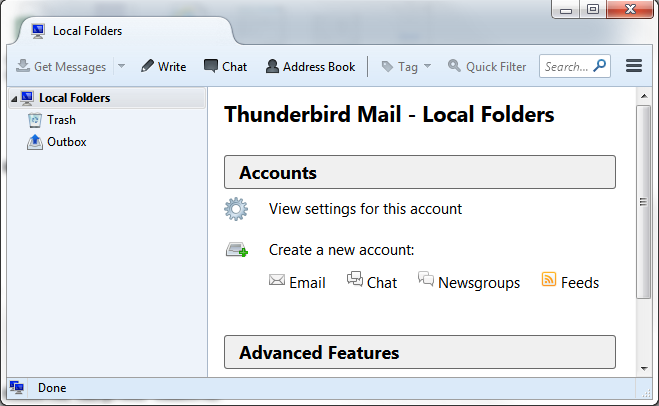
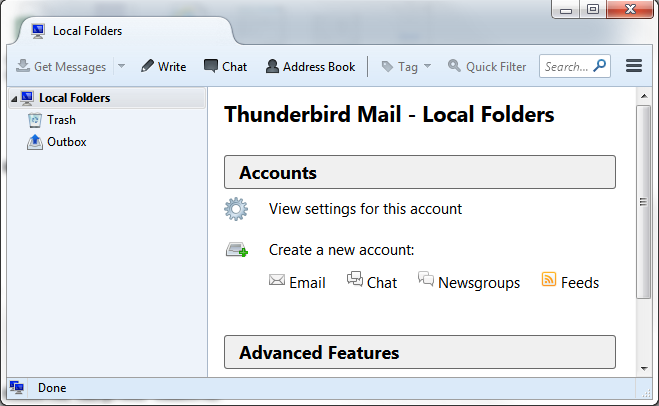
1. Open Mozilla Thunderbird.
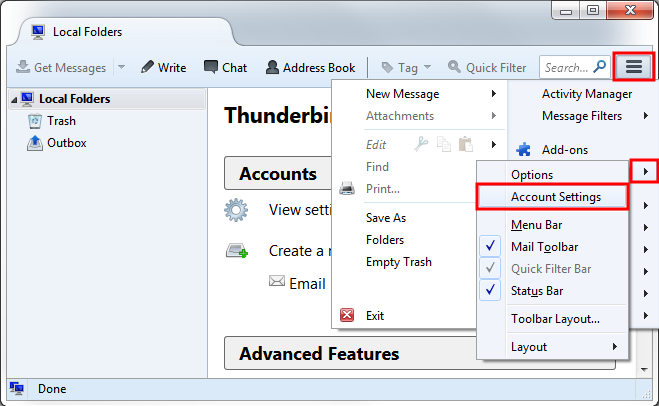
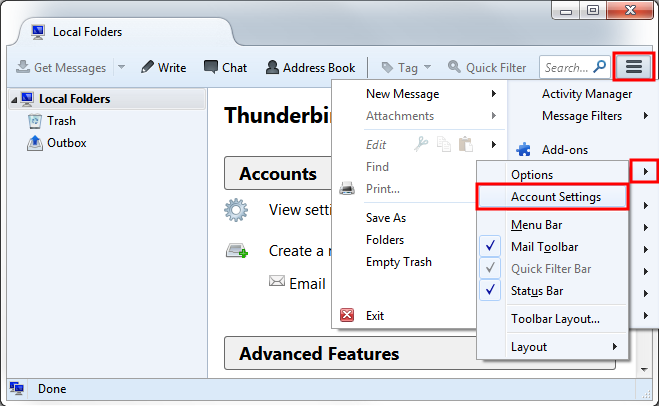
2. Click on the Menu button on the right side of the window, then hover your mouse over Options, and finally click on Account Settings.
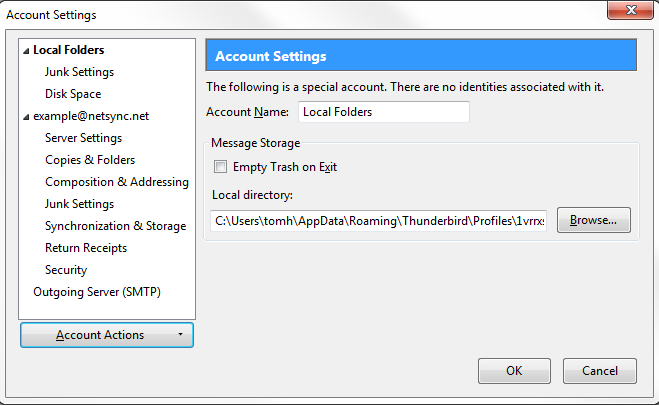
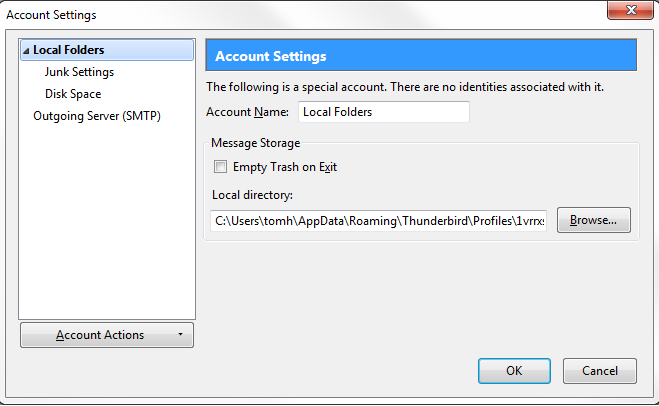
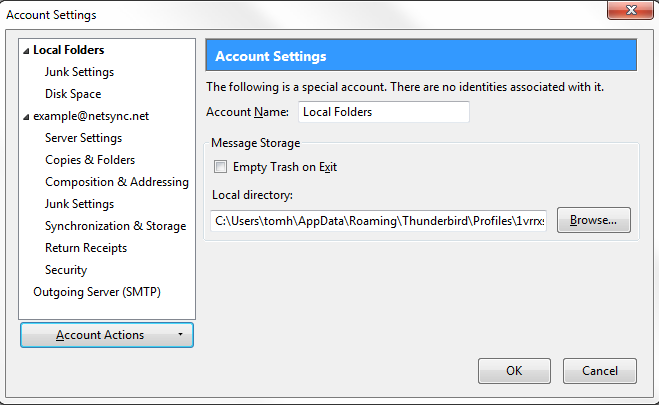
3. The Account Settings window will appear and will look like the image below.
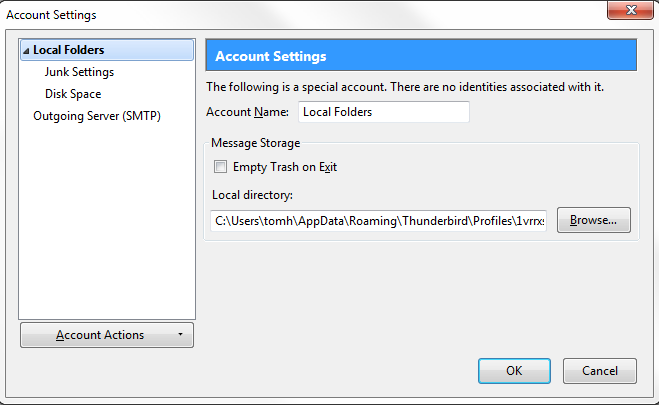
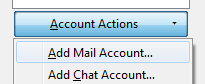
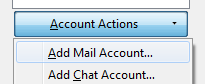
4. Click the Account Actions button, and then click Add Mail Account.
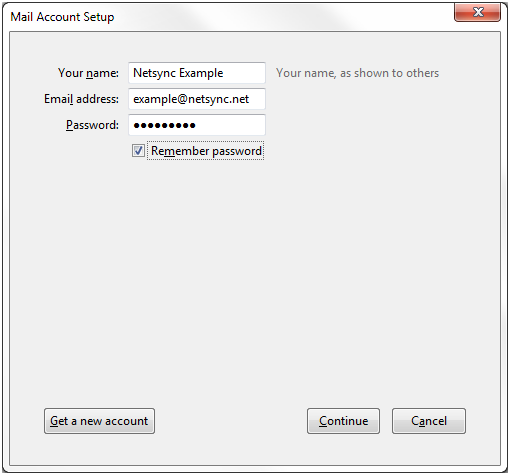
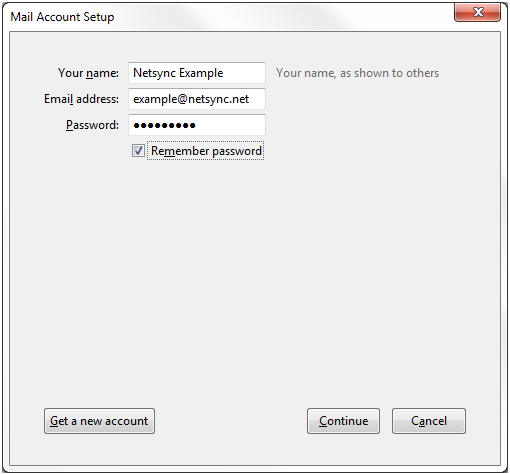
5. Enter your name, your e-mail address, and your password into the fields below. Then click the Continue button.
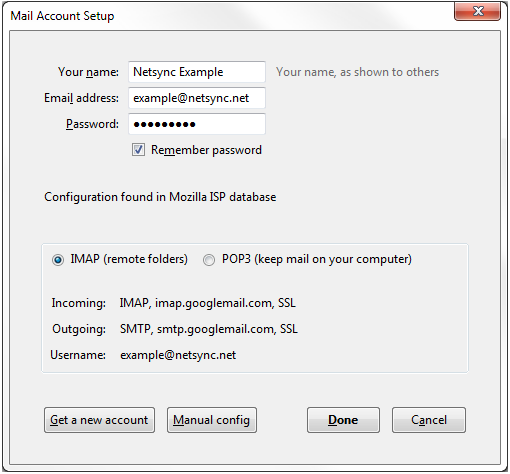
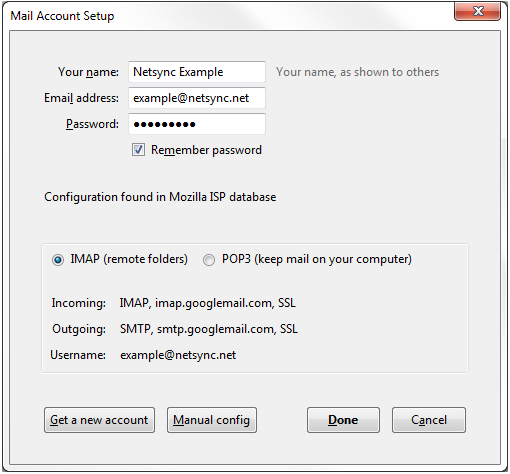
6. Thunderbird will try to auto-detect the correct e-mail settings for you and show you the results on the screen. The settings that it finds are not correct. So, we will need to change them to the correct settings by clicking on the Manual config button.
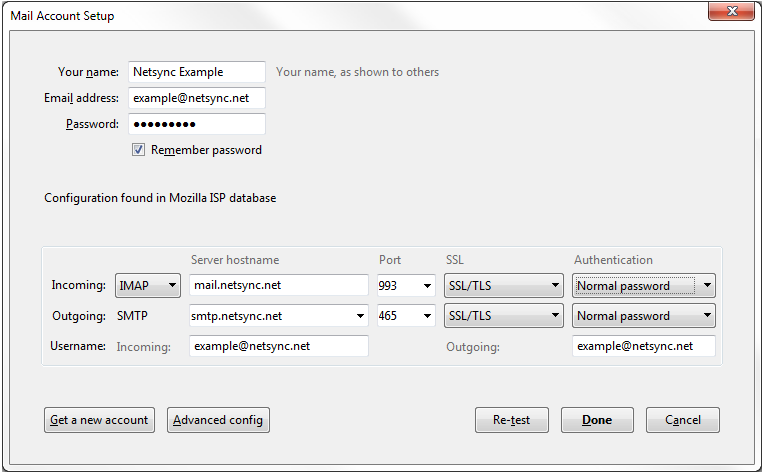
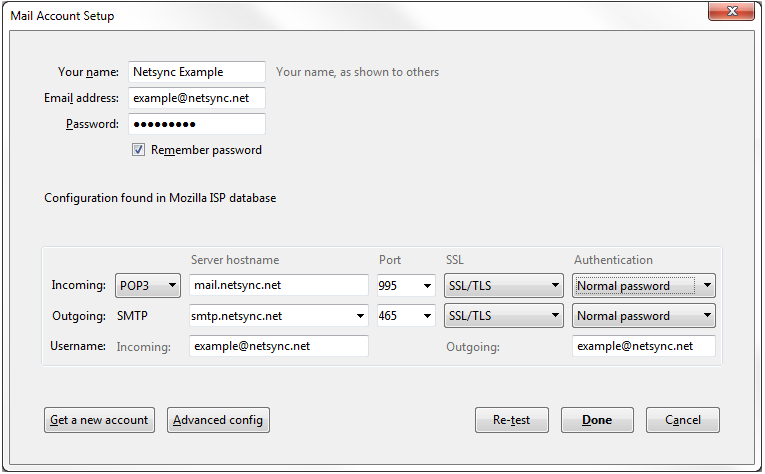
7. Enter all the settings exactly how you see them in the image below, with the exception that anywhere you see example@netsync.net, please replace that with your own Netsync e-mail address. Then click the Done button. If the Done button is grayed out and you cannot click on it, double check and make sure that both of the drop-down boxes under Authentication both say Normal password, then try clicking the Done button again.
8. Click OK.
1. Open Mozilla Thunderbird.
2. Click on the Menu button on the right side of the window, then hover your mouse over Options, and finally click on Account Settings.
3. The Account Settings window will appear and will look like the image below.
4. Click the Account Actions button, and then click Add Mail Account.
5. Enter your name, your e-mail address, and your password into the fields below. Then click the Continue button.
6. Thunderbird will try to auto-detect the correct e-mail settings for you and show you the results on the screen. The settings that it finds are not correct. So, we will need to change them to the correct settings by clicking on the Manual config button.
7. Enter all the settings exactly how you see them in the image below, with the exception that anywhere you see example@netsync.net, please replace that with your own Netsync e-mail address. Then click the Done button. If the Done button is grayed out and you cannot click on it, double check and make sure that both of the drop-down boxes under Authentication both say Normal password, then try clicking the Done button again.
8. Click OK.
Mac OS
1. Open Mac Mail.
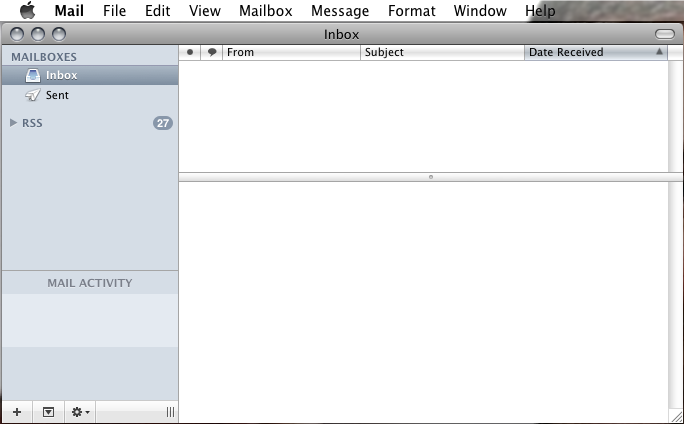
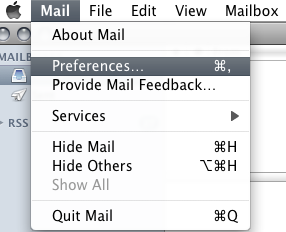
2. Click on the Mail menu, then click Preferences.
3. The Accounts window will appear. Click on the + (plus) button at the bottom left hand side of the window.
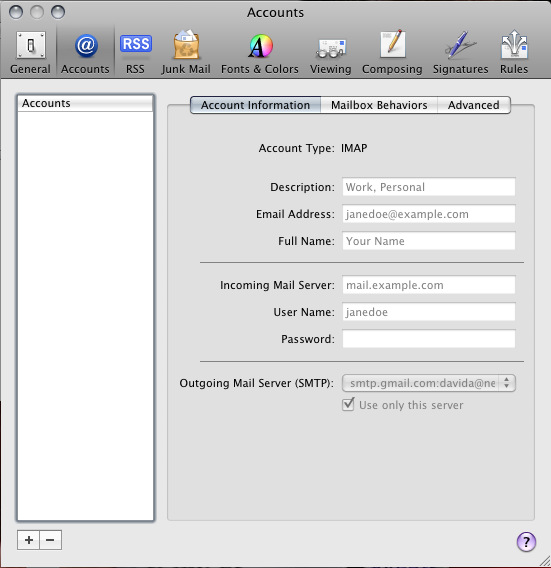
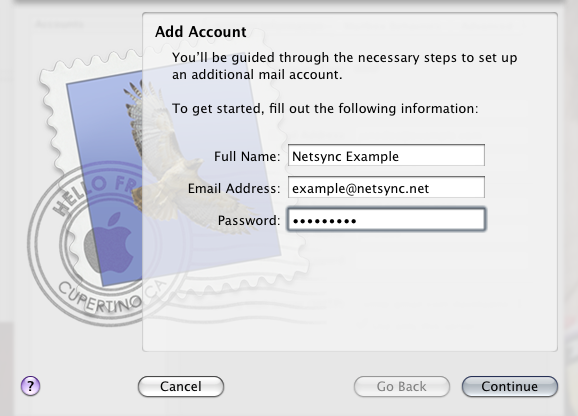
4. The Add Account window will appear. Enter your name, e-mail address, and password. Then click Continue.
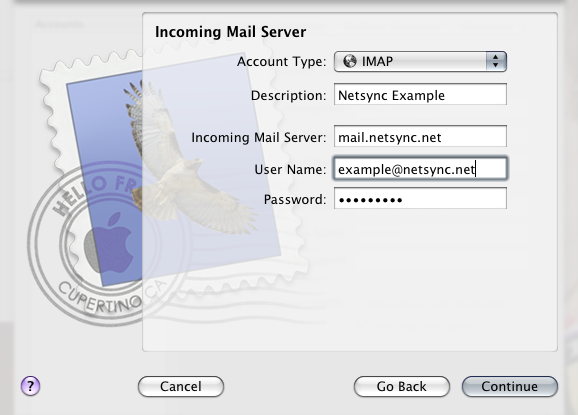
5. Under Account Type: choose IMAP from the list, and for the Incoming Mail Server: field, enter mail.netsync.net just like the image below. Then click Continue.
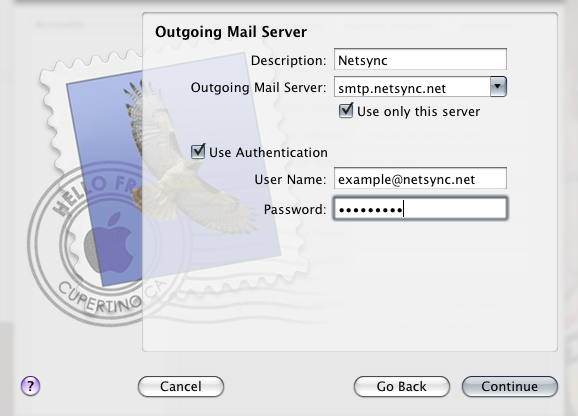
6. Enter all the information exactly as it appears in the window below with the exception of the User Name: field. Please enter your Netsync e-mail address instead.
7. Place a check mark under Take account online, then click Create.
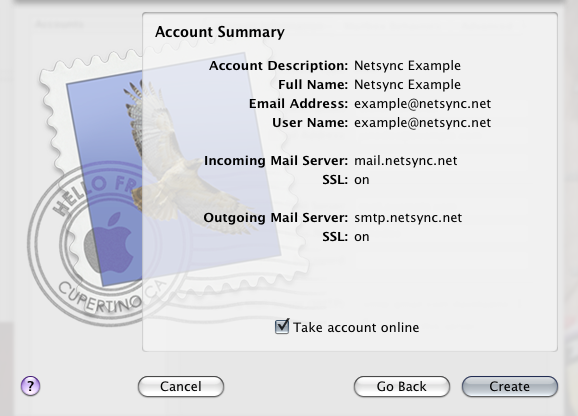
8. You will be returned to the Accounts window.
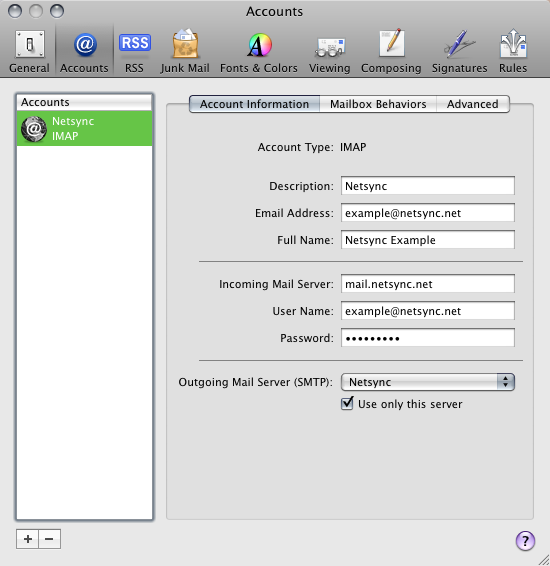
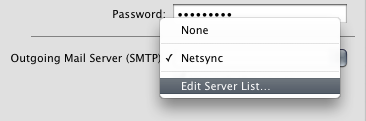
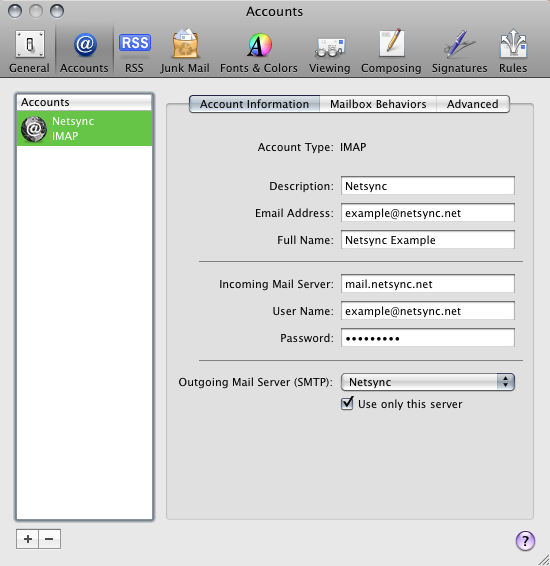
9. Under Outgoing Mail Server (SMTP): click on the drop-down box, then click on Edit Server List.
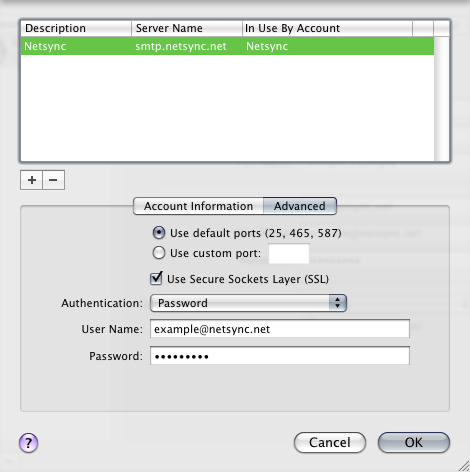
10. Under Account Information, enter the settings exactly as they appear in the image below. Then click Advanced.
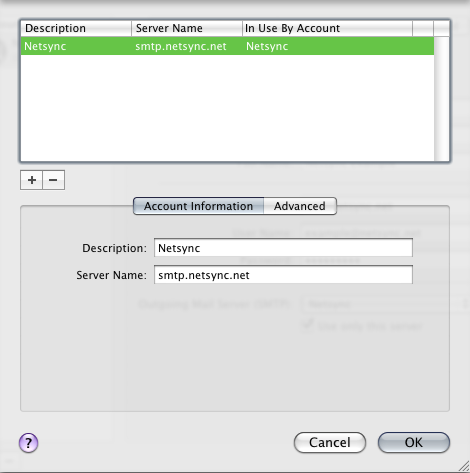
11. Enter all the information exactly as it appears in the window below with the exception of the User Name: field. Please enter your Netsync e-mail address instead. Then click OK.
12. You’ll be returned to the accounts window. Click Advanced.
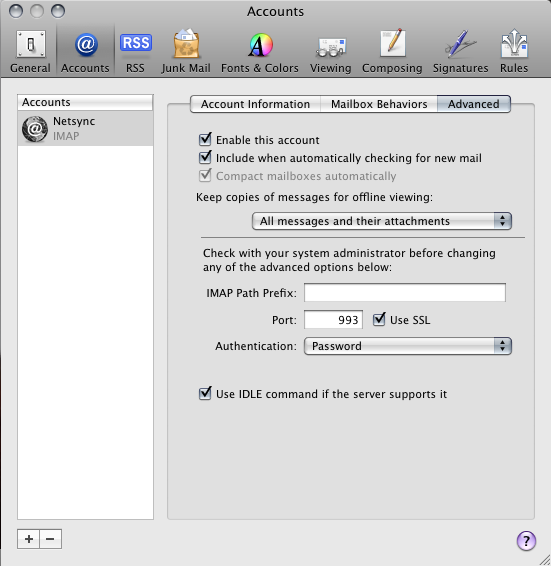
13. Enter all the information exactly as it appears in the image below. Then click the close button in the upper left corner of the window. You may be asked if you want to save the changes. If you are asked, then save the changes.
Contact support
Can’t find what you’re looking for? Give us a call or fill out the form below!
Request support
"*" indicates required fields